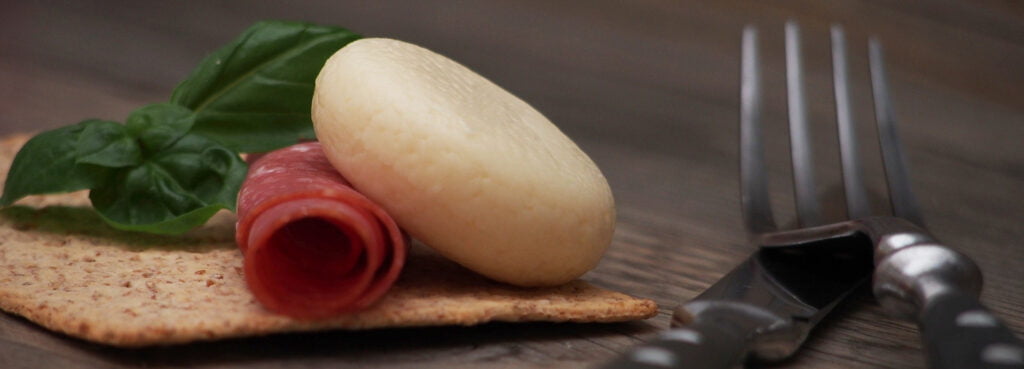
How to Finish (or Refinish) a Charcuterie Board
Beautiful, Easy to Apply Finishes for Wooden Kitchen Items - Charcuterie Boards, Cutting Boards, Salad Bowls, Wooden Spoons and More.

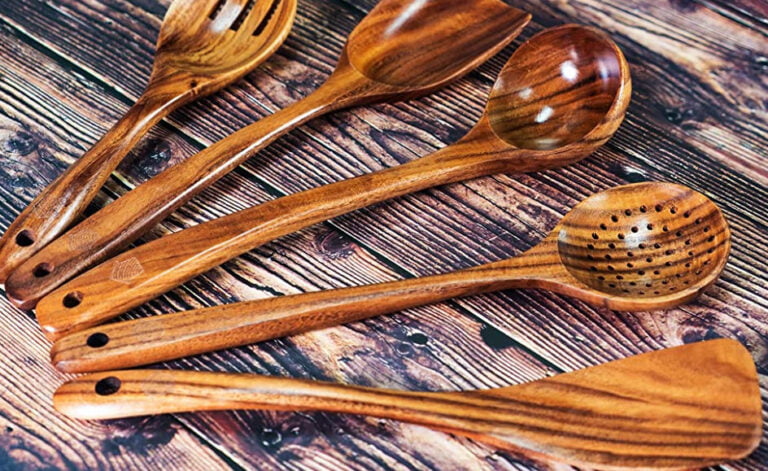
Some of you, dear readers, will have arrived on this page from my tutorial on making your own cutting or charcuterie board. And thanks for joining us again! However, really this topic can be applied to all of your wooden kitchen items, not just newly created items you just finished making all by yourself that end in the word ‘board.’ Think salad bowls, spoons, knife handles and like, that sort of thing.
Equally, subject to some clarifying remarks that I shall endeavor to remember to make later on in this discussion, these finishes can be used to renew fading finishes on your well loved wooden kitchen things.
Wooden kitchen item finishes need to be a couple of things. One, offer the wood some protection, including being at least fairly water resistant. Two, not poisonous. (Hint: you should not need to ask for an explanation of the rationale behind these points). And they should look good. So three things I guess. Possibly more.
Because we want a food safe finish, we’re eliminating a lot of great finish options, including those that probably would offer the best protection for our precious wooden items. Most of the food safe ones are not also the most protective.
The good news is that there still are some great options for inexpensive, easy to apply, quality finishes for WKI. That’s my newly invented abbreviation for ‘wooden kitchen items,’ not a misspelling of something like Wikipedia.
Our focus in this article is to outline a few excellent choices for finishing our WKI. It is not to comprehensively discuss every detail of every wood finish. For that, you’re going to want to read Bob Flexner, who literally wrote the book(s) on wood finishing and is probably considered by most to be the #1 expert on the subject. As he will tell you, the world of wood finishes is rife with confusing obfuscation, mostly created by the wood finish companies themselves who for unknown reasons will do almost anything to avoid telling you exactly what type of finish it is that they’re trying to sell you. They apparently think that it’s a better idea to try to create some mystique around their product by just providing a fancy description of how great it is than by telling you what it actually is. Sometimes the product info is just straight misleading. Anyway, we won’t get in to all of that, we’ll go right to the straight goods.
Let’s consider our options:
Oil Finishes
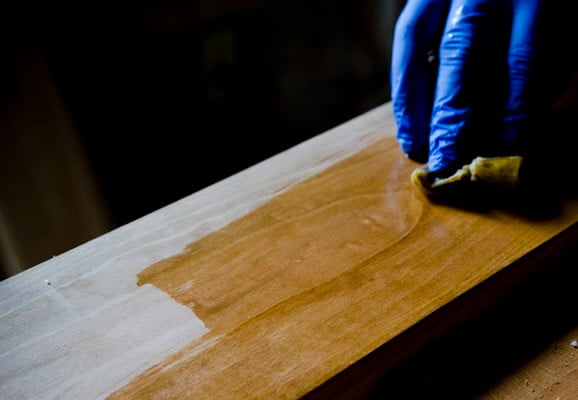
First amongst our options will be a simple rubbed oil finish. And if you want to stop thinking about finish decisions right here and be done with it, you could do a lot worse. An oil finish can be very inexpensive, doesn’t require any tools, is easy to apply, hard to mess up, looks good and will protect your wood. They can be anywhere from a bit slow to very slow to go from start to finish, but if you’re the patient type you’re good to go.
Just like the term ‘rubbed oil finish’ sounds, you get some oil, a clean rag (a bit of an old cotton t-shirt is perfect), and you rub some oil on to the wood. Let it soak in a bit, apply a bit more if there are drier spots developing, rub off any excess that hasn’t soaked in after maybe 20 minutes or so and then leave it to dry for probably a day or two (maybe more, depending on which oil you’re using). Repeat. Repeat again if you like, depending on how things are looking, maybe a few more times, or not, as your patience vs. perfectionism determines. If things start getting away on you, a very light sanding with a very fine grit sandpaper can get you back on track. An oil finish will build up and gradually create a deeper and more lustrous sheen with additional coats. But you can also stop pretty much anywhere along the way, and you can generally come back and add more later to spruce things up if it gets worn down.
Since we’re talking about items that will come in to contact with your food, we’ll be using a food safe oil. Not that extra pint of 10W30 that’s been in the trunk of your car for the past four years.
There are a lot of oils that are made from food to begin with, like olive oil, sunflower oil, peanut oil, etc. The problem with some of these oils is that, as food will eventually go rancid, so will they.
These are the Oils that we’re going to be considering:
- Mineral Oil
- Walnut Oil
- Raw Linseed Oil
- Pure Tung Oil
Mineral Oil is a petroleum product, but somehow is totally food safe. I don’t know how that works exactly, but apparently it does. You won’t want to eat too much of it however, as it is sold in pharmacies as a laxative. That will be the easiest place to purchase a bottle, and as some good news, it doesn’t cost very much. Mineral Oil is a very commonly used wood treatment and is great for cutting boards. It never really dries, but more gets absorbed in to the surface of the wood. It is totally clear, so won’t add much color to the wood. It will need to be reapplied fairly frequently on something like a cutting board that gets lots of hard use, but that is easy to do.
Walnut Oil is not as clear as mineral oil and will probably cost you a bit more. You’ll find it at a well stocked grocery store. It won’t eventually go rancid like most other food oils. It is a drying oil, so it will dry to a film finish. Apparently walnut oil does not contain the nut proteins that could trigger allergic reactions, and at least some of it is heat treated, further reducing any concerns with allergies. Still, that might be something to think about in deciding whether or not to use it. It is a popular commonly used kitchen wood finish, so it should be OK, but there you go.
Raw Linseed Oil is starting to get more in to ‘real woodworking’ type finishes. You’re going to be looking for it in hardware stores rather than in grocery stores or the pharmacy. There are plenty of woodworkers who say that linseed oil makes one of the best looking wood finishes. Not the vast majority of them or anything like that, but a bunch. A lot of those woodworkers will use boiled linseed oil rather than raw linseed oil, because it contains additives that make it dry a lot faster. Because of those additives, we don’t want to use that on our food items. We want the raw stuff, and we want to wait and wait and wait for it to dry to that beautiful finish. After all, we must be the patient type who believe that good things come to those who wait if we’re choosing to use this stuff. Depending on various conditions you can expect to wait from about 3 to 7 days for a coat to dry, and longer for it to fully cure after that. Make sure to keep your coats thin. It does look great though! You’re probably not going to be using this on something like a cutting board due to the long drying time and not wanting to have to redo it all the time because of repeatedly taking a knife to it after all that waiting. Maybe something more along the lines of that showy salad bowl that you bring out when you want to impress your guests.
Pure Tung Oil might be the most highly regarded oil finish (or any finish) there is. It has beautiful depth and dries to remarkable toughness for an oil, including having good water resistance. Be careful that you’re getting 100% pure tung oil. There are plenty of finishes with ‘Tung Oil’ in the name or on the label that contain lots of other stuff besides just tung oil. You’re probably going to be finding the real stuff at a specialty store rather than a home center. It takes a while to dry between coats, at least a day, maybe more. You’ll want a number of coats to bring it to full beauty. A good option for a charcuterie board or other show pieces.
Shellac
Shellac has been a highly esteemed, fine wood finish for centuries. And … it’s completely edible and hence food safe. It’s fairly easy to apply in our kitchen item context, is a top notch ‘sealer’ for your wooden items, and provides decent protection. Individual coats dry very quickly. It looks stunning. A downside might be the steps required to prepare it, assuming you can’t find pure stuff premixed.
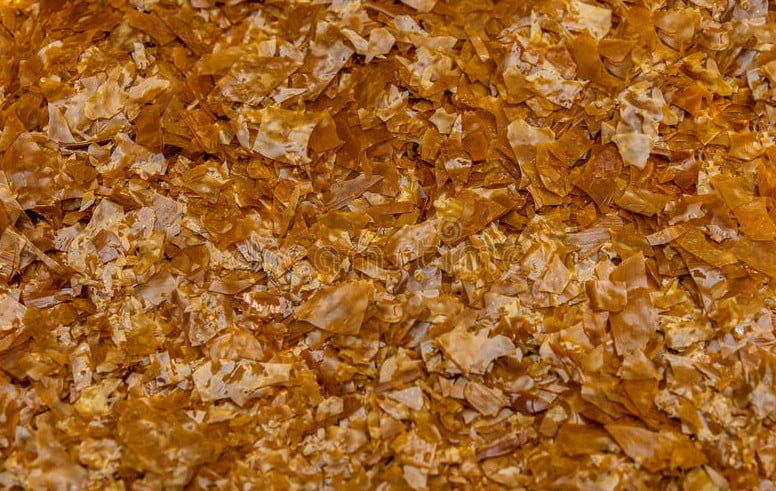
Shellac begins its journey as excretions deposited on trees by the lac beetle in southern parts of Asia. Those excretions are collected and processed in to delicate flakes. Later, we’ll dissolve those flakes in alcohol to prepare them for application. Once the shellac solution is prepared it’s used to finish all sorts of things like fine furniture, high end guitars, fingernails, apples and candy.
As with the tung oil, you’ll want to be sure that you’re using a pure shellac product as opposed to a blend containing shellac. Generally this means that you’ll be mixing your own.
Shellac flakes are available in a number of shades from blonde through to ambers and then to dark garnets. It comes in its original waxed form or you can get it de-waxed. Generally we are going to lean towards de-waxed versions, as wax introduces some complications in to things and wax can always be applied later if desired.
Shellac is usually dissolved in ‘denatured alcohol.’ That is usually made from 95% ethyl alcohol (the good stuff), and 5% poison (usually methanol) that the government requires be added to it for our protection. All the alcohol and methanol will evaporate as the shellac dries, thus rendering it food-safe again. 95% denatured ethanol can be found as a ‘rubbing alcohol’ at pharmacies. 99% isopropyl (from the pharmacy) will work as well. Just make sure not to get the lower concentration rubbing alcohol also available at the pharmacy, often 70% isopropyl.
An alternative for those who don’t like the idea of using the poisonous denatured alcohol is to buy a 95% grain alcohol like Everclear and use that. That’s more expensive though. On the upside, you could have the odd sip during preparation.
Shellac is mixed in a ratio known as a ‘cut.’ A ‘two pound cut’ refers to the blend made by dissolving two pounds of shellac flakes in a gallon of alcohol. Four pound cut would be four pounds in a gallon. And so on and so forth.
We’re not going to need that much for our little kitchen things and it won’t keep forever. So I’ll suggest making a two pound cut in a small jar with one cup of alcohol and two ounces (by weight) of flakes. Store any leftovers (flakes & mix) in a cool, dark place.
It can take a few days for the shellac to fully dissolve in the alcohol. Stirring it once or twice a day will help speed that along. I like to use a glass jar to be able to see what’s happening in there, but be warned that the shellac will glue your jar lid tight together if it gets on the threads of the jar. Mason jar lids with the flat part of the lid separate from the threaded parts can help with that. You’ll need some channel locks (big pliers) or something to get the jar open if shellac gets on the threads – so be careful with that, and be careful not to break the glass and hurt yourself if it does get glued shut.
Shellac can be applied in a variety of ways, for our purposes here we’ll be using either a rag or brush, as you prefer. You want a dedicated brush for your shellac (not an old one with bits of paint in it), preferably one with natural bristles if you have one. A ‘taklon’ brush is superb for shellac as well. Be careful with synthetic brushes (which are commonly used for latex paint) because some will start to sort of dissolve a bit with the alcohol and get kind of limp and clumpy and generally not work well. Don’t ask me how I know that. Apply a nice thin coat as evenly as you can. Don’t obsess because we’ll be adding more coats and sanding in between every now and then. If using a brush, the brush doesn’t even need to be cleaned between coats. It will harden up, but will re-soften once put back in the shellac a few minutes before the next use. If you wanted to clean the brush, you’d use the straight alcohol and then soap and water, but you probably wouldn’t get it all out anyway and the brush would still harden up and you’d wast a lot of Everclear that you could otherwise be drinking. Hence the dedicated brush.
Each coat of shellac will add another very thin layer to the overall build up of the finish. Each layer will actually ‘burn in’ to the previous layer, so it all becomes a single thicker layer. Still, it is best applied in numerous thin coats than trying to flood it all on at once. Each coat will dry quickly and new coats can be applied in as little as half an hour or an hour, depending. Later coats might want a bit longer than earlier ones as it builds up thicker.
There are other specialized ways of applying shellac such as spraying or the ‘French Polish’ method. That’s a bit beyond the scope of this article, but maybe we’ll look at that another day.
Shellac is a great finish by itself, or it can be applied over a well dried oil, or even under a well dried oil. Darker colors of shellac will provide a warmer tone to your piece, so have fun and experiment. If things go wrong shellac can be removed with the straight denatured alcohol and a bit of sandpaper.
Shellac is great and versatile stuff. It is a stunning wood finish. It is the ultimate wood sealer to put under other finishes – you know those pine knots that always show through latex paint? Seal your pine with shellac before painting, no more knots. Shine your nails. Glaze your pies. Get to know shellac, and go finish your charcuterie board with it while you’re at it.
Secret Recipe Mineral Oil and Beeswax Blend
I could be overstating the ‘secret’ part of this recipe a bit. It’s actually a fairly well known recipe. And for good reason, it’s easy and works very well for certain kitchen items, especially for things like wooden spoons, knife handles, salad spoons, things like that. It can be used on salad bowls and cutting boards and other wooden things too but I think it’s best for the wooden bits that tend to dry out regularly. It seems to work sort of like a hand moisturizer does when our hands get a bit dried out – it remoisturizes, and it protects.
Now I know that the suspense is probably almost too much to bear by now, so I’ll just come right out and tell you the recipe: Mineral Oil and Beeswax.
Wait, should there have been more fanfare before that announcement??? Oh well, too late now.
So we’ve talked about the penetrating, moisturizing use of mineral oil as a finish – now combine that with a protective wax barrier against further water infiltration. Sounds pretty dreamy right? And of course it’s food contact freindly and dead simple to apply. You just rub a little on and in with one rag, and buff it out with another, cleaner rag that isn’t all covered in the stuff like the one you rubbed it in with. Renew as required.
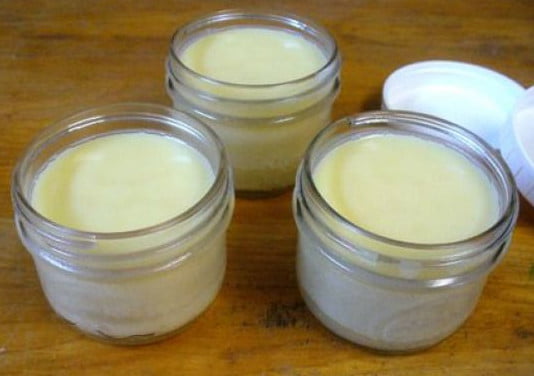
All we need to do is prepare a little jar of the stuff to keep in the kitchen, and we’re all set.
Now there are actually lots of suppliers who will sell you this exact same mixture in a tiny cute little jar or tin at a nice healthy markup. Which is all fine and good, go ahead and buy that if you like, it’s quick and easy. However, if you’re still reading this by now (anyone?), you’re probably going to DIY it, because clearly, you know how to persevere.
So, the mineral oil, as we discussed above, comes from the laxative section in the pharmacy. For beeswax you’re going to want to go talk to your local neighborhood beekeeper, or failing the availability of that, order it from somewhere. Think candle making suppliers.
The ratio of the mix is something of a matter of preference. It can be made a little wetter (more oil), making it easy to rub in and apply, but maybe taking a bit longer to dry to the touch. It can be a little harder (more wax), making it a bit tougher to rub in and buff, but being a bit more waxy (and a bit less greasy) right away.
A good starting point to finding your perfect ratio is to start with a blend of about 1 part wax to 5 parts oil, which can be made (approximately) by mixing a cup of oil with 2 oz (by weight) of wax. You’ll be heating the mixture up to blend the two together. If you’re not happy with the way it turns out, you can easily amend the ratio one way or the other by reheating and adding a bit more wax or a bit more oil.
Now, the oil starts out as a liquid, and the wax as a hard block. What you want to do is gently heat the oil & the wax until the wax melts & can be blended together with the oil. After they’re blended, you’ll let it all cool as a new pasty combined concoction.
The wax will melt at a fairly low temperature, far below the boiling point of water.
Mineral Oil is combustible, and we don’t want to set the whole thing on fire. Hence the ‘gently’ heat it up part. Low and slow is the way to go. Slowly heat and stir your mixture until it’s all nice and blended.
A double boiler type system is best for this as it helps regulate the heat. If you’re going to be keeping your mixture in a mason jar or something like that – perfect. You can heat your oil and wax right in the jar in a pot of water. Less clean up.
If you want to heat the mixture directly in a pot without a double boiler type setup then fine, but keep an eye on it (and keep stirring frequently) so that it doesn’t overheat.
Once you have a nice consistent blend of the oil and the wax, remove it from the heat.
If you’ve heated your mixture up in the jar it’s going to live in then you just need to wait for it to cool down to room temperature.
If you heated it directly in a pot, then allow the mixture to cool a bit until it’s cool enough to pour in to whatever container it will live in, then pour it in there. Allow it to further cool to room temperature and set.
Congratulations, you’ve just created a highly secret, almost magical, kitchen miracle sauce!
To use, you’re just going to wipe some on to your wooden item with a clean rag – again, a bit of old cotton t-shirt is perfect. Don’t put too much on all at once, a little goes a long way. Give it a good rub, then switch to a clean rag to buff off any excess, and maybe another for a final buff. Get some on your hands, your skin will love it. Try it as a lip balm while you’re at it!
Because of the wax content here, you probably don’t want to use this on something that you might want to finish another way in the future. You can’t put another finish over wax without first getting the wax removed. Start with your dried out wooden spoons and knife handles, and see how much you love it from there. Whether it goes on your wooden bowls, cutting boards and other items is all up to you.
Refinishing Your Worn Wooden Kitchen Items
We’ve talked a lot about the various suitable finishes for your wooden kitchen items,
Way back at the beginning of this page I warned you that there could be severe ramifications to trying to refinish a WKI with the wrong type of finish.
Actually, I guess what I said was “subject to some clarifying remarks that I shall endeavor to remember to make later on in this discussion, these finishes can be used to renew fading finishes on your well loved wooden kitchen things.”
The ramifications probably won’t actually be what you could sensibly call ‘severe.’ I was just trying out a little bit of hysterical hyperbole there, for dramatic effect.
Certainly, some wood finishes can be incompatible with one another, just like people or charging cables. A lot of the time though, once a finish has been in place for a long time, and it’s particular solvent has long since evaporated, that potential for incompatibility is diminished and an ‘incompatible’ finish can actually still be successfully applied overtop it.
One big exception to this would be wax finishes. It’s not really possible to apply a new finish over wax, other than more wax that is, until the wax is removed. The typical way to remove wax from wood is to scrub it with a mineral spirit soaked rag and maybe some steel wool or something, rinse all that off, let it dry, assess the results and perhaps repeat, and then sand it to hopefully get the last of it off. Since mineral spirits are icky around food (although it does get wiped off and will eventually evaporate) you can try using a 50/50 or stronger vinegar/water solution instead. Or just go straight to the sandpaper, depending on how much wax remains. Use new sheets of sandpaper along the way – there’s no point in trying to remove wax by rubbing something with a piece of wax coated sandpaper. If you can get the wood sanded clean and fresh it’s like new and you can apply whatever finish you like. But, it’s always possible that you’ll never really get all that wax off.
There are specialized commercial stripping solutions that you could go to if you really wanted to. There are also probably professional services for this sort of thing, but we’re kind of talking about wooden spoons and things here, not heirloom quality buffets, so let’s not get too carried away.
This stripping and sanding thing goes for most other finishes as well, although the solvent to dissolve the finish (if there is one) can differ. Sanding will get them all eventually. Even ‘penetrating’ finishes don’t really penetrate wood very deeply at all, and most finishes leave basically just a very thin film on the wood’s surface. Heavily pored woods will need more sanding as the finish will have sunk down in to those deep pores. Anyway, pretty much any finish can be sanded off to start fresh. This can be a great way to renew say, a stained and beat up cutting board. It can be tougher for items that have lots of curves and nooks and crannies. With flatter items you can use a power sander and save yourself some valuable time that could be put to better use by mindlessly watching some lame sitcom on television.
Finishing Up (Get it?)
We’re finished talking about finishing things. Let’s do something else for a while. If you’ve read this far, you deserve a break! Thanks for hanging around!